One of the most crucial features for an Enterprise – Grade digital signage solution has to be the creation of multiple ‘Child’ or ‘Linked’ layouts that are controlled or follows one common ‘Master’ or a ‘Template’ layout. This ensures that all layouts created and displayed under the organization will have the same ‘Corporate Image’ while allowing different users in different departments to add and manage their own respective images, videos etc. This allows for a more controlled, hassle – free and productive workflow within the teams.
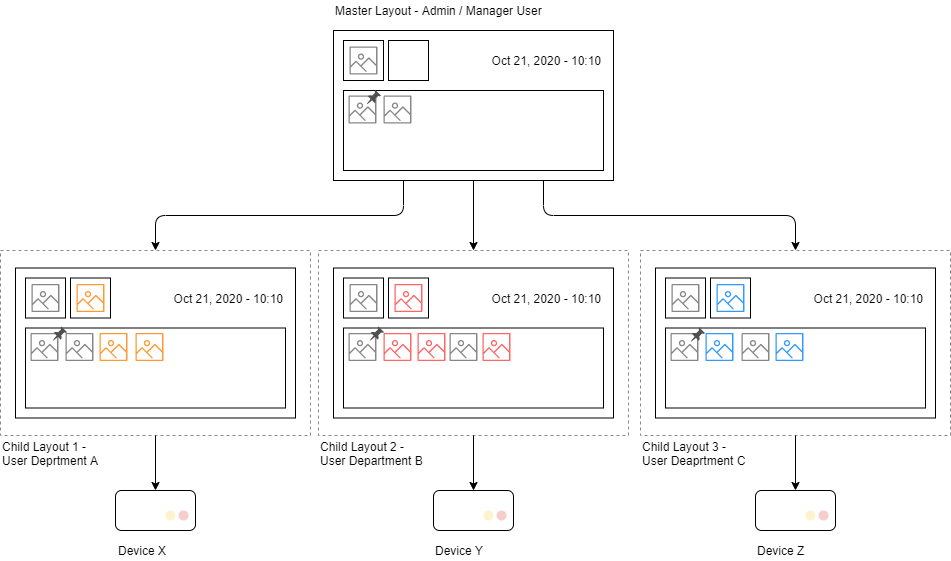
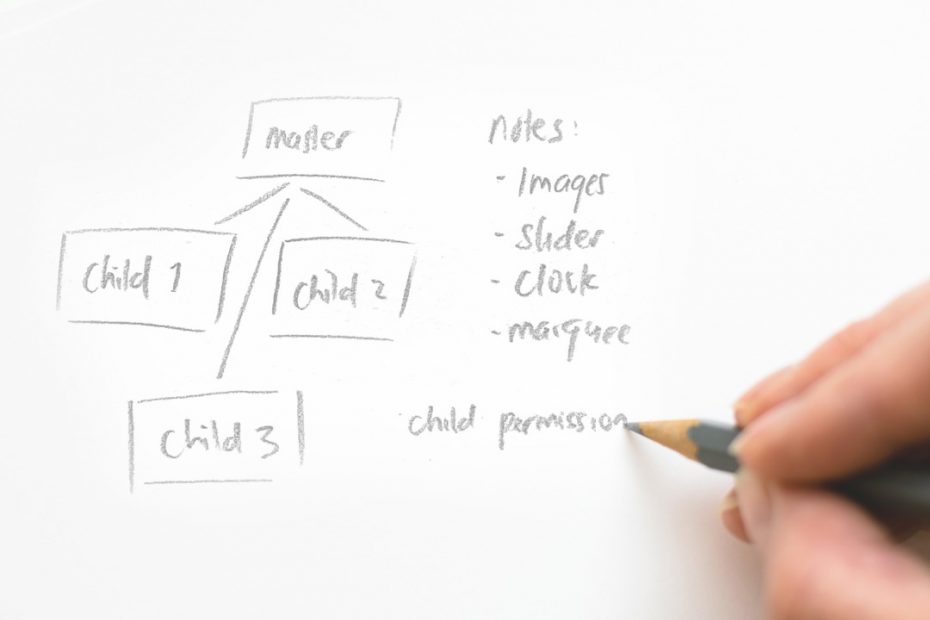
Screenplify’s ‘Master – Child’ implementation lets you create a layout and convert that layout to a Master Layout which in turn will act as the general template for all the child layouts created under it. Master Layout has control over;
- Layout Design: Child Layouts cannot add components, change layout dimensions, or design.
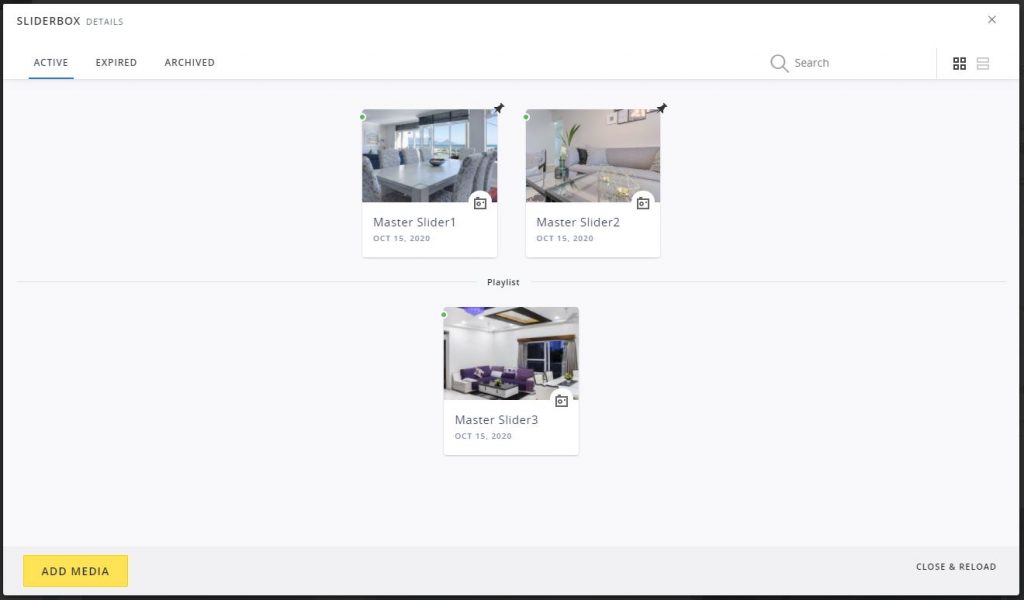
- Layout Content: Child Layouts can add or update content ( Images, videos, etc ) for components that have been granted to do so by the master. Components that have multiple media, such as the Sliderbox have the feature to ‘Pin’ content as well.
- Layout Schedule: While the Child Layouts can have their own independent display schedules, the Master Layout schedule can choose to overwrite or reset the children’s schedules anytime.
- Device Layout: You cannot assign a Master Layout to a device. You can only assign Child Layouts
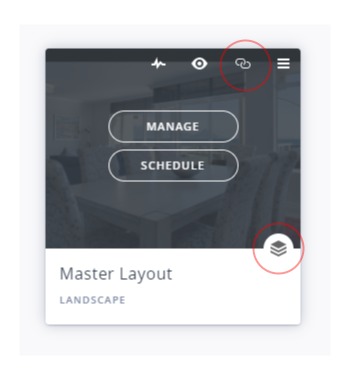
Once a layout has been converted into a Master Layout, an icon will indicate it is now a Master and an additional button will link to the Child Layouts under it.
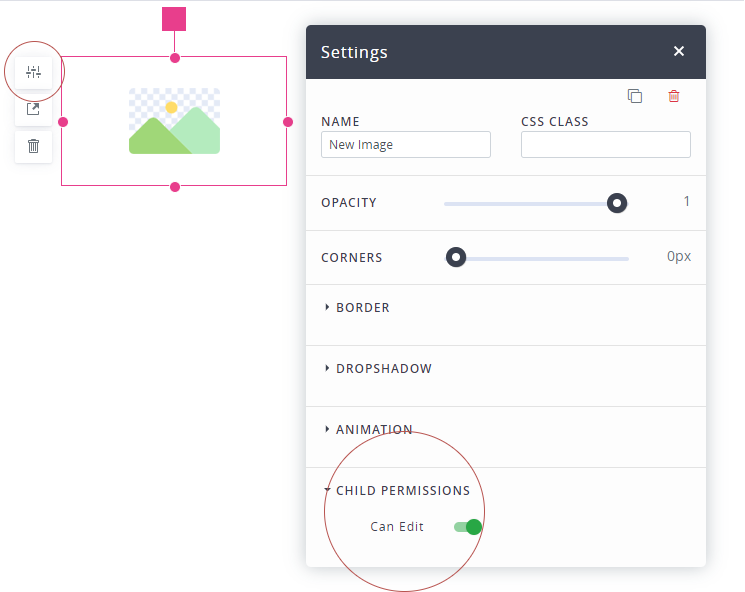
Child Permissions
This is the ‘toggle’ for the Master Layout to enable Child Layouts to add and manage its own content. All the components will have this feature and is ‘disabled’ by default. You will have to enable it for the components that you wish to grant access to. This only allows the child to edit the content ( Images, videos, etc ) for the component, it does not allow the child to change size, position or any other ‘design’ properties.
Pinned Content
Components such as Sliderbox have the ability to include a mix of media, such as Images, Videos, etc. Any media added from the Master Layout cannot be edited or deleted by the Child Layouts. Master Layout also has the ability to “Pin” content; which means once the content is pinned by the Master Layout, it will be shown before the child content in the order set by the Master. If Master has added content but is not “Pinned”, the content will be mixed in with the child content and can be ordered by the child.
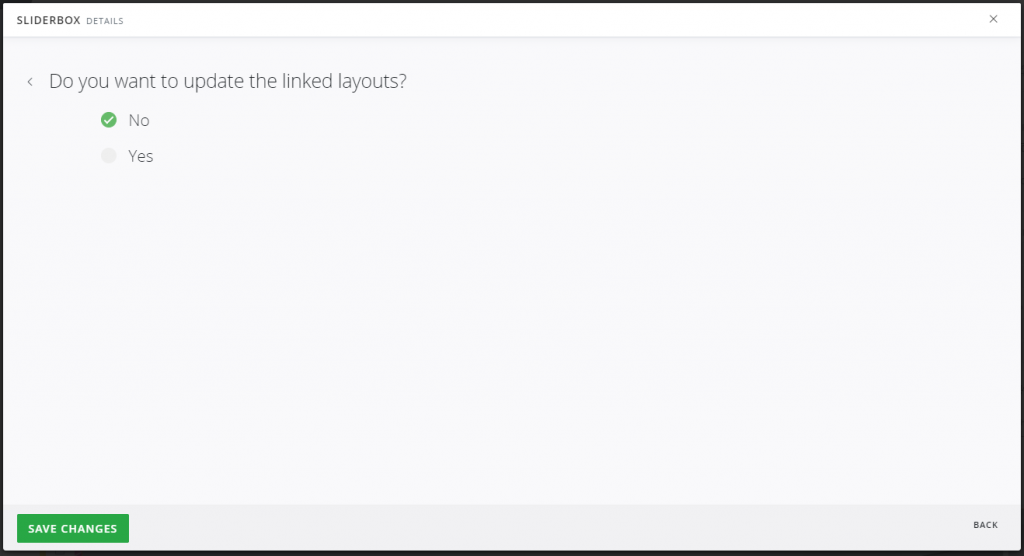
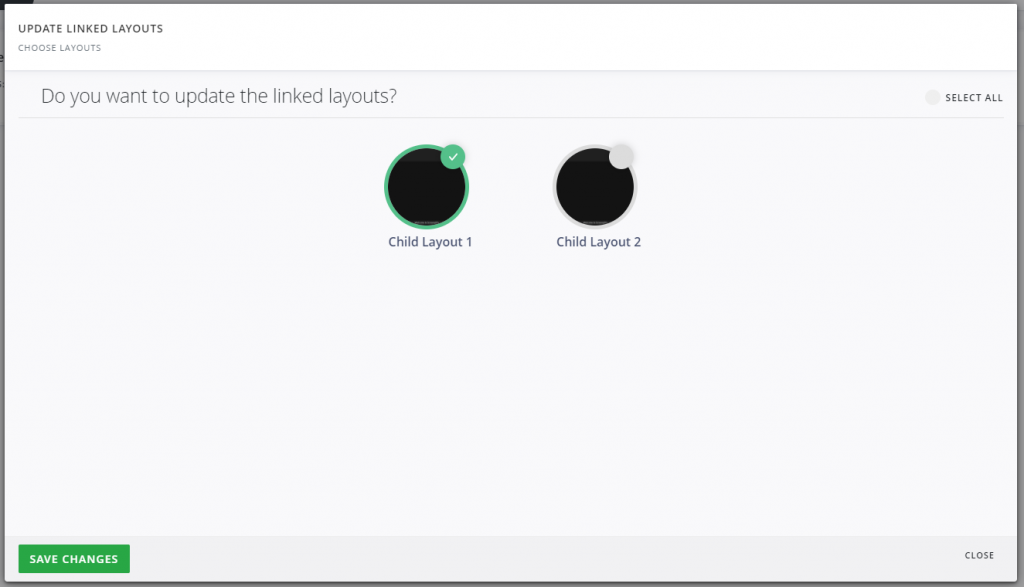
After you have created Child Layouts, any subsequent addition or change to the content of the Master Layout will have a prompt asking if the Child Layouts need to be updated as well.
Layout Schedule
The Child Layouts can have their own schedules independent from the Master Layout. However if you edit the Master Layout schedule and press “Save” you will be prompted asking if you would like to overwrite the Child Layouts.
How to Video
Follows a step by step video showing how to create a Master Layout and update corresponding Child Layouts